
You might be interested

The good news: you can likely get started with the camera you already have.
The bad news: once you do, you’ll probably be hooked for life.
Plan ahead
The first step, as always, is to plan.
“Get out there and try! But also, do the research or attend a workshop that gives you the information about how to stay safe and get results when shooting at night,” says nocturnal photographer David Atkins.
“I was actually blessed with perfect conditions on my first shoot. I have since learnt that your pre-planning is critical.
“Even if you do this perfectly, still have a small degree of realisation that things can, and often will, not go exactly as planned! Be ready to change your ideas or even admit defeat if the many variables don’t go your way.”
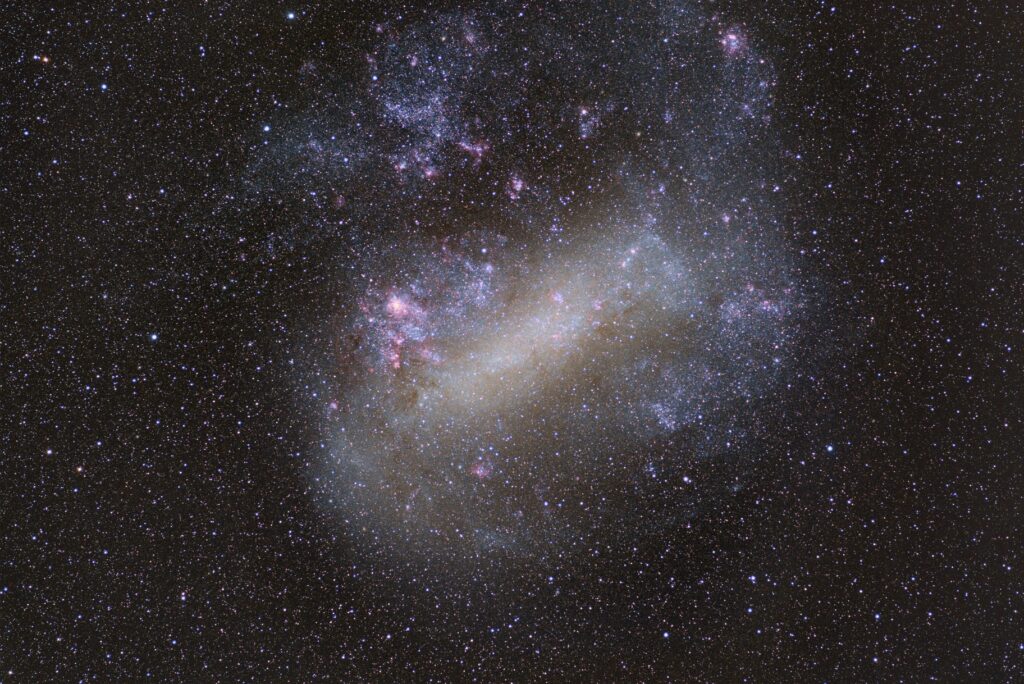
Graham Kelaher (who took the header image on this post) agrees:
“Behind every picture is a story. Start with the picture you want to take in your mind and work backwards from there.”
Use what you have
Astronomy is all about collecting as much light as you can from the sky. Imagine that starlight is like rain falling from the sky. You’ll catch more with a big bucket than you will with a small bucket. And, the longer you leave your bucket out, the more light you’ll collect.
So what do we actually need? If you’ve got a camera and a tripod, you’re pretty much set.
“One can do an extensive amount of astrophotography with a standard camera and lens with the right advice – definitely enough for a beginner to figure out if astrophotography is the right hobby for them or not,” says William Vrbasso
That means you want a big sensor, rather than a small one – so a proper camera, not just a smartphone. And it means you’ll want to be able to leave the camera shutter open for longer, or take multiple pictures, one after the other – so you’ll also want a tripod to keep things consistent and stop your pictures coming out all blurry.
One thing you don’t need (at least not right away) is a telescope.
“Don’t buy a telescope! At least, not initially. Many aspirants spend lots of money buying a telescope thinking this is required for astrophotography,” William says.
“Then, when the disappointment occurs – because you need to gain a fair bit of experience to get good photos through a telescope – the expensive equipment ends up sitting in the corner collecting dust.”
The last bit of gear you definitely need, William reminds us, is also something you already have: “Don’t forget to bring a warm jacket!”
Get start(rail)ed
So we’re geared up and rugged up – where do we start?
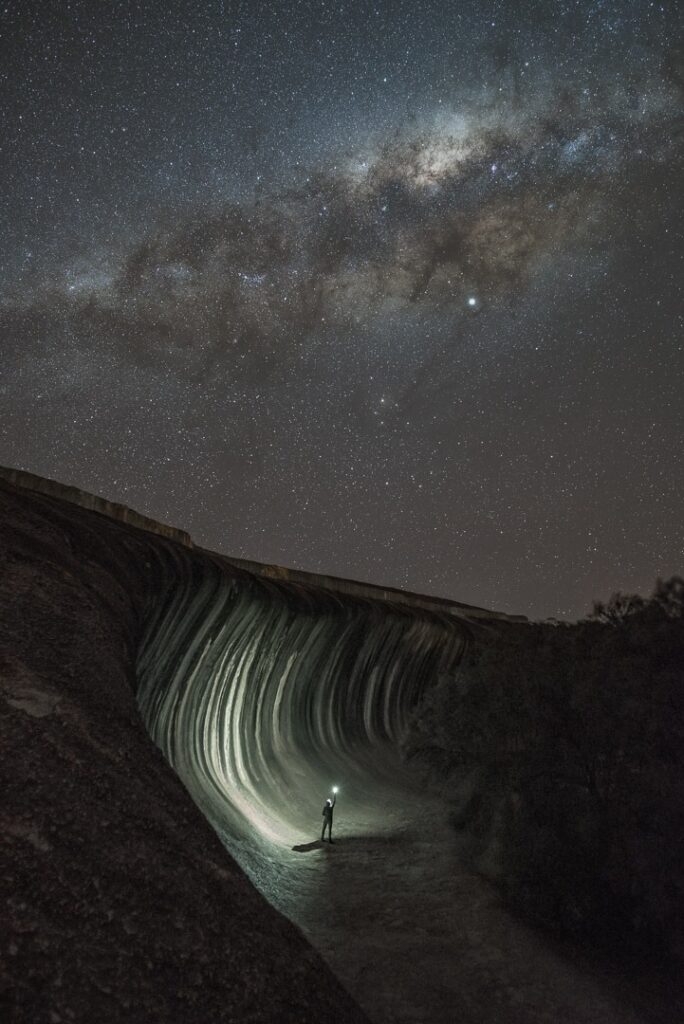
“Time lapses, star trails and Milky Way photos are the easiest to start with,” recommends Keith Wetton.
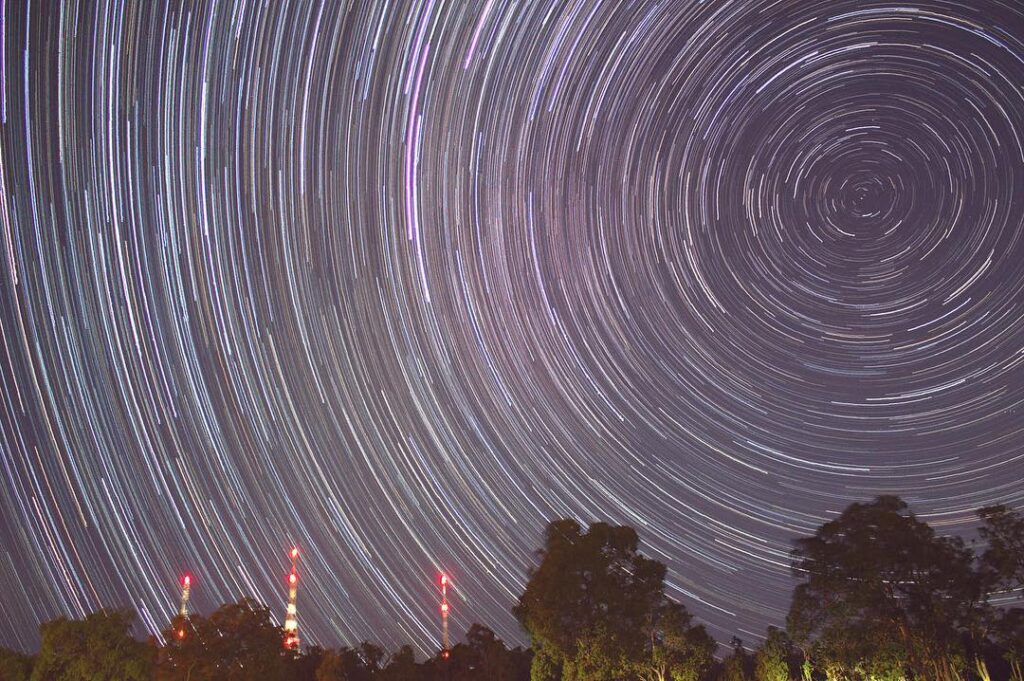
“I started with only a basic camera and the kit lens. All you need to get started is a tripod and an intervalometer.”
An intervalometer is exactly what it sounds like – it takes photos automatically at a certain interval. If you flick through those photos quickly, you’ll get a time lapse, and if you layer them on top of each other, you’ll get some amazing star trails. Some cameras will have one built in, but if not, this is one bit of specialised astrophotography equipment to keep an eye out for if you do decide it’s something you want to keep doing.
“You might think your photos aren’t that good, but trust me, your friends will always be impressed and wonder how you did that,” says Keith.
So go ahead and share them straight to Instagram (let us know if you do!) – but maybe hold off on the Photoshop to start with.
“Don’t worry too much about editing your photos, you’ll overdo it. I completely mucked up the white balance on my first attempts,” he says.
Stay on track
Star trails are pretty, but the next step up is actually to get rid of them. One way to do this is with a tracking mount, which can follow objects across the sky – as the Earth moves, so does your camera.
“Start with wide angles and a tripod. If you decide to move to using tracking gear, do your research carefully and buy the best you can afford,” says Andrew Lockwood.
“You can get great results with only good camera gear and a small tracking mount if you’re patient.”
To get it working properly, you’ll need to make sure your mount is rotating the same way the sky (or rather, the Earth) is. This is a process called polar alignment.
“Practise polar alignment in a comfortable environment before doing it out in the country in the dark,” says Andrew.
(We’d probably extend that to everything you do, not just the tracking!)
You can do it
The best thing you can do to figure out if astrophotography is for you is to give it a go – just make sure you bring some patience and perseverance,” says Ken Lawson.
“Get out and try it! The level of entry is so low these days anyone can do it.”
Our thanks to Roger Groom, ICRAR and the rest of the Astrofest team for their help putting this article together.